When flight simulators are released, they include a series of airports that are relatively generic in nature. In many cases, the base airports are reasonably accurate: the buildings, taxiways, and signs match airport diagrams. However, they may not be as visually stunning as some of the high-quality add-ons that are available.
In other cases, you may find issues with lighting, taxiways, or airport design in the base simulator that can be frustrating–especially if they affect an airport you fly to frequently.
Of course, real-world airports change over time. They built new taxiways and runways and expand terminal buildings. By default, these changes won’t be reflected in your simulator. That’s where add-on scenery comes in!
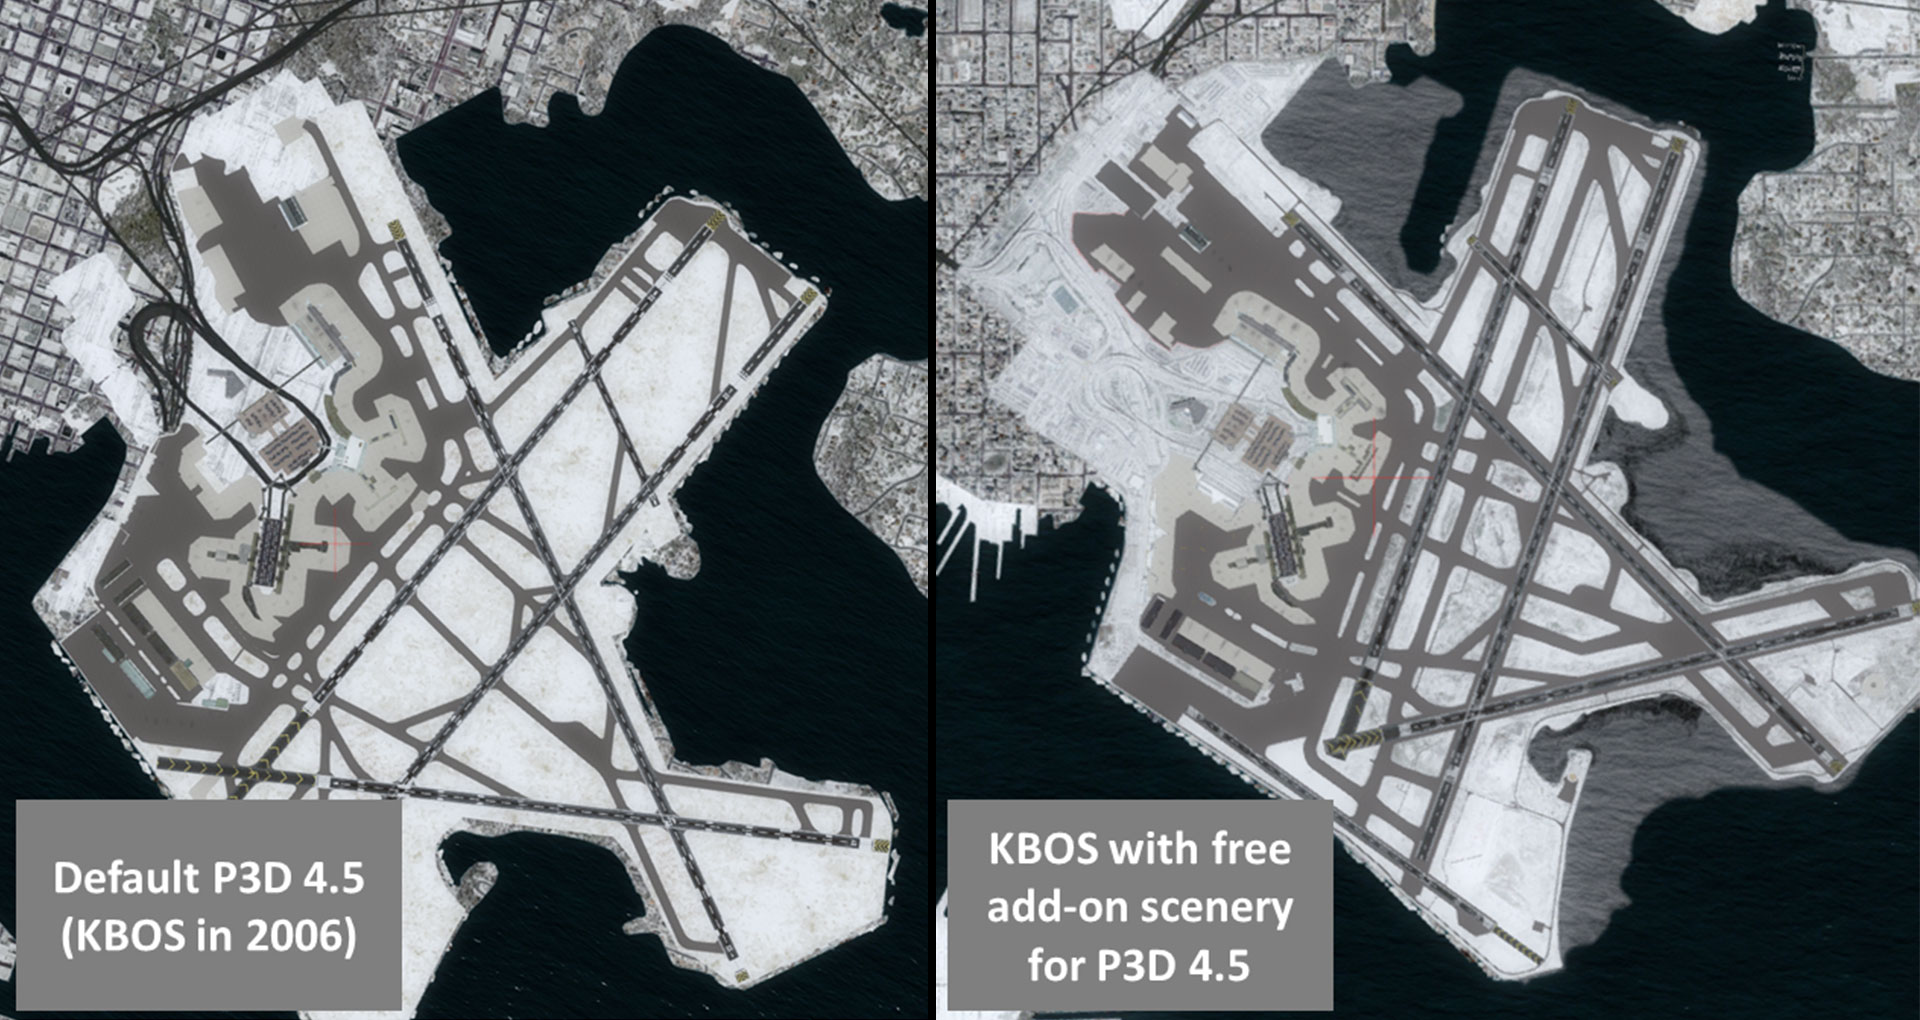
On the left, you'll see KBOS as released in Prepar3D v4.5, which represented the airport in 2006. The image at the right shows KBOS after a free update was installed for the same Prepar3D v.4.5. Can you spot the differences?! You can see that quite a bit has changed in the last few years.
Screenshots by Chris R.
Microsoft Flight Simulator (MSFS)
Because of the way it was designed, many smaller airports in MSFS have inaccurate taxiway signs or lighting that differs from the real-world airport.
However, the community has been working quickly to fill the gaps left in the default airport designs and you’ll find hundreds of free airport updates available. The website Flightsim.to is a great place to search for airports created by community members. In addition, the payware development community is quickly improving many of the world’s most popular airports (see the “Payware Scenery Options” section below for more information).
As an alternative to finding and installing scenery updates for each airport you fly to, consider Just Flight’s Real Taxiways. This add-on corrects taxiway sign placement and accuracy for thousands of airports in a single installation.
X-Plane
X-Plane is the only simulator to fully embrace crowd-sourced scenery updates. Laminar Research, creators of X-Plane, have made a program called WorldEditor (WED) available to the community. This allows any user of X-Plane to use the stock library objects in X-Plane to edit and submit airports for approval.
Using the X-Plane Airport Scenery Gateway, users can search approved updates and can download them. In addition, staff “recommend” specific airport updates for inclusion into future versions of X-Plane. This significantly reduces the need for users to search for and find third-party airport updates on places like AVSIM.
The X-Plane Airport Scenery Gateway features scenery with X-Plane’s default object library. Beyond that,
there are many other third-party sources offering great freeware scenery that make use of custom
objects. X-Plane.org is a
great place to search custom scenery packages for X-Plane, which will generally be installed into the
.../Custom Scenery/ folder of your simulator’s installation. As you’re searching, you’ll
come across various “libraries” that scenery packs will require. You only need to install these
libraries once.
Payware Scenery Options
Like with other Software Add-ons, there are free and paid options for add-on scenery across all simulators. Before jumping into paid scenery options, we encourage users to look to the freeware community. There are thousands of updates that will improve the accuracy of your simulator, and even some freeware scenery files (like this one for KBOS by MisterX) that look like payware quality!
In addition, some payware developers also provide free products. For example, If you fly in FSX or P3D and have purchased any of Orbx’s Global products, we recommend you install their Global Airport Pack. Available free to any Orbx Global customer, the Global Airport Pack contains hundreds of stunning airports with custom models, animated people and trees, static aircraft, and more. In general, the pack is focused on smaller, general aviation airports in unique settings.
In general, payware scenery tends to go beyond simply modifying airport layouts for accuracy. These days, you’ll often find custom-built 3D terminals, moving jetways, custom ground textures, and a whole lot more from payware scenery.
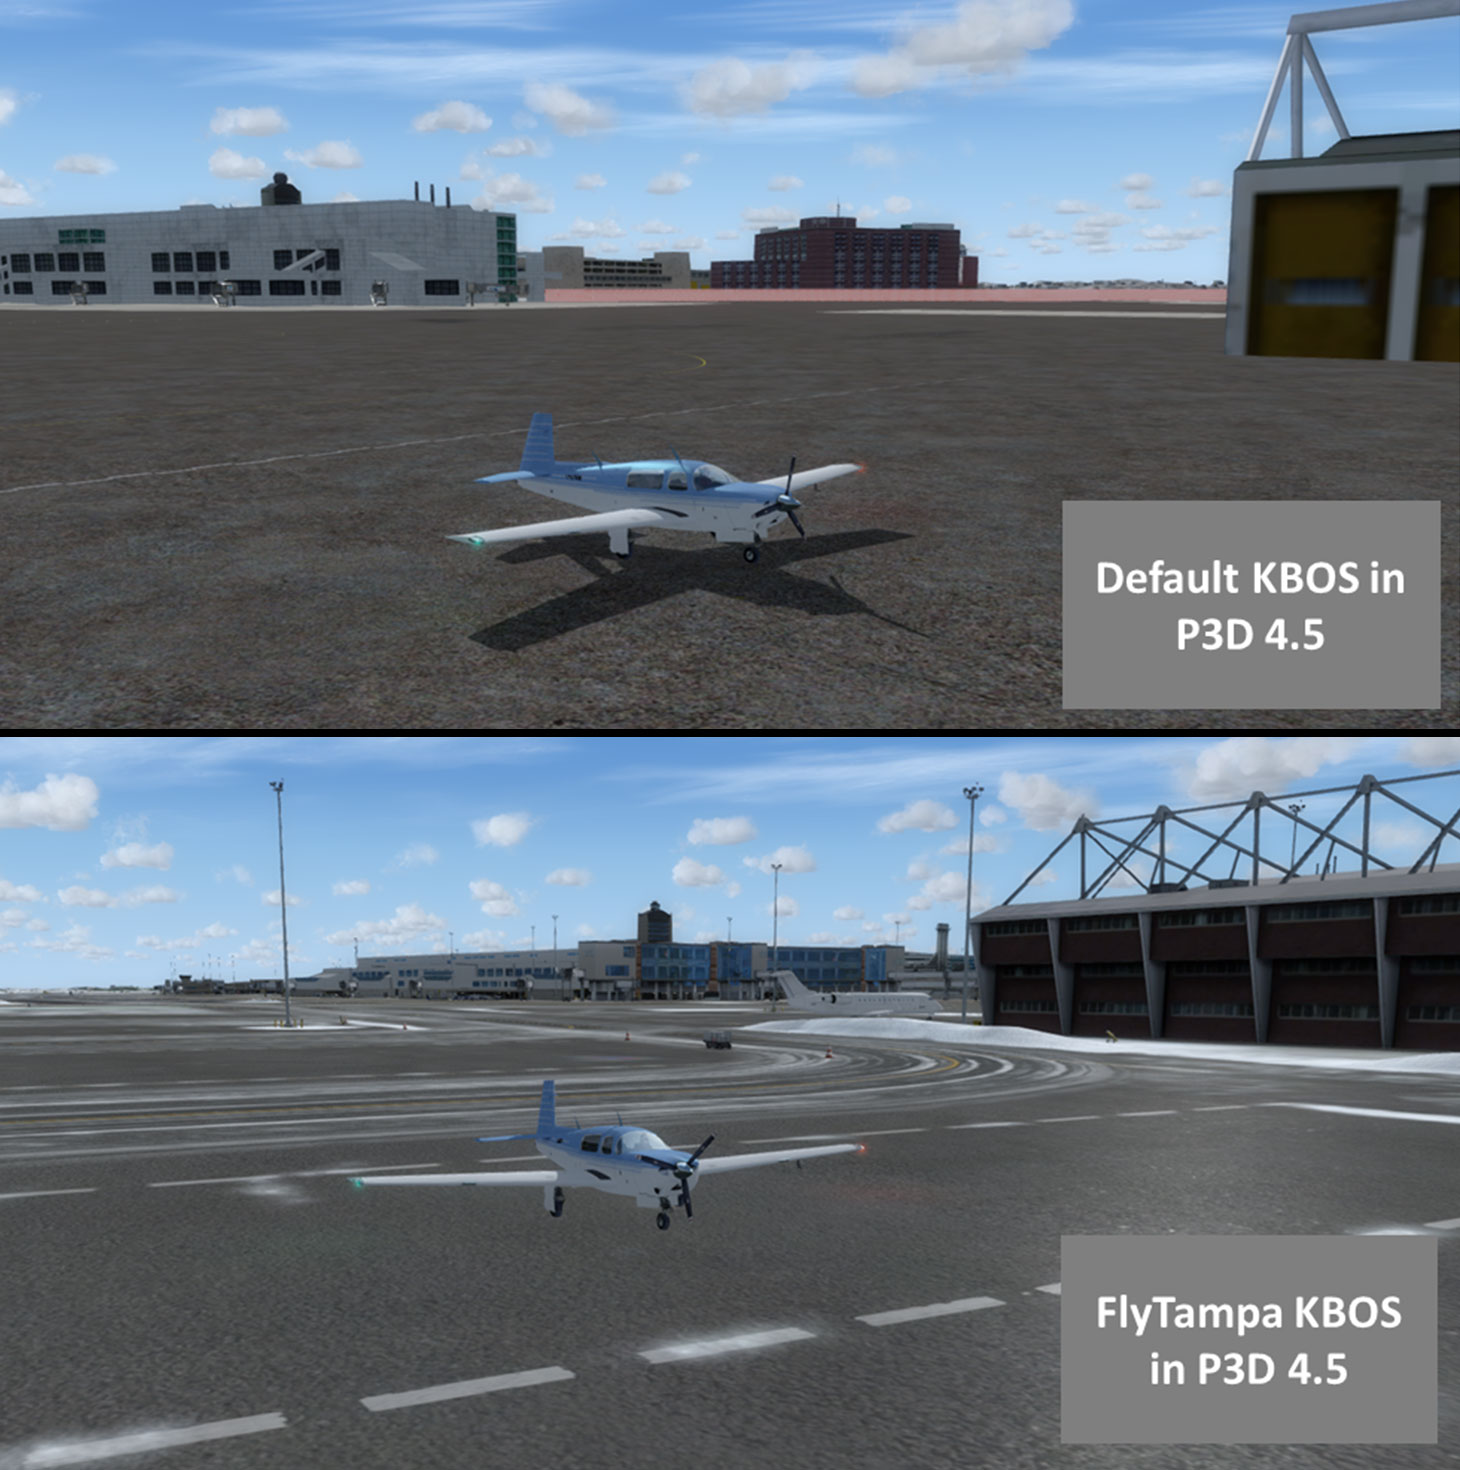
In addition to just updating taxiway layouts, payware scenery often adds custom models and textures. Compare the default KBOS on the top with the $28 version from FlyTampa on the bottom. You're paying for the extra detail on the hangar, terminals, and even the ground textures on the FlyTampa scenery.
Screenshots by Chris R.
Because each simulator is different, you’ll find a variety of scenery options available for each sim. Some of the community’s largest scenery developers create products for all sims, while others focus on just one or two.
There are two ways to find great-quality payware options. If you are looking for an update to a specific airport (perhaps because you like flying there), search the airport and simulator on Google (“KBOS Scenery Prepar3D”). You may find one, or several, payware options. You can also search FSElite for the latest news on payware products. Use the URL https://fselite.net/discover/EDDN, changing the last four characters to the ICAO code you want to find. Finally, you can search the simulator marketplaces like Aerosoft’s web store or SimMarket.
Alternatively, you might just be looking for beautiful stuff. If so, names like Aerosoft, FlightBeam Studios, FlyTampa, LatinVFR, and Orbx tend to top the list of the community’s favorite and large-scale payware airport developers. You can also browse the list of scenery developers who offer discounts to our members.